 Scan Scan
The SCAN option, activated by selecting the SCAN icon located to the right of a field box or by selecting F2, allows you to look up information from a file when you do not know or cannot remember specific key values. For example, as you enter an adjustment to a customer’s account, you cannot remember the general ledger account number to which to post the adjustment. With your cursor positioned at the OFFSET ACCOUNT field, select the SCAN icon directly to the right of the item as shown in Figure 9. You are immediately taken to a display of records in the Chart of Accounts file (where general ledger account number is the key), and can step through the records in the file until you find the desired record. Double-click on the line displaying the desired account description and the selected account number is automatically entered into the offset account number field on the adjustment entry screen.
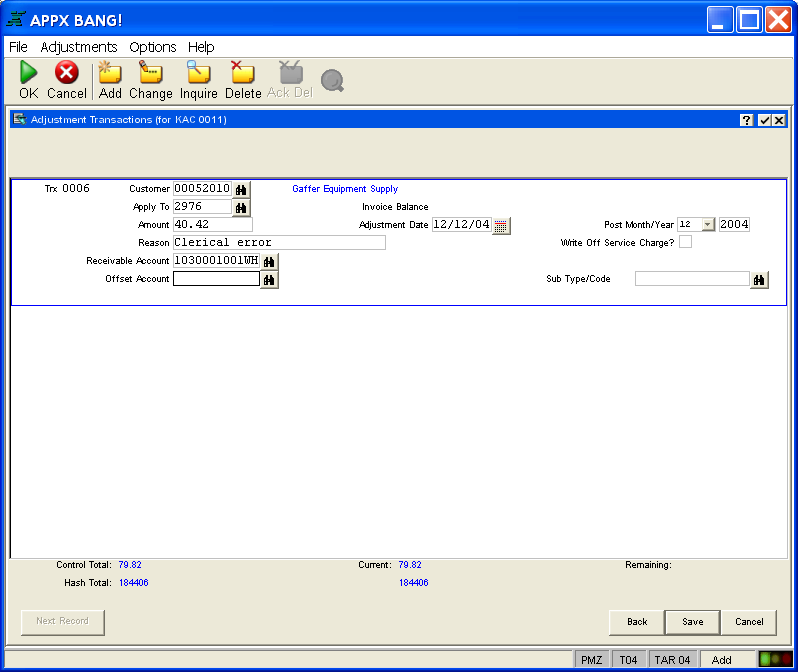
Figure 9. An Input Process With Scan Fields – Initiating a Scan Operation
In this example, you can also constrain the scan operation by providing a starting or partial key value once the operation starts. In this case, the records that display after you select SCAN begin with the lowest key value in the file. For example, if you know that the account number begins with “301” you could enter then enter “301” in the Scan overlay’s account number field (as shown in Figure 10). Just begin typing regardless of where the cursor is positioned and your entry will automatically appear in the key field box. Then select ENTER to display the constrained Scan display as shown in Figure 11.
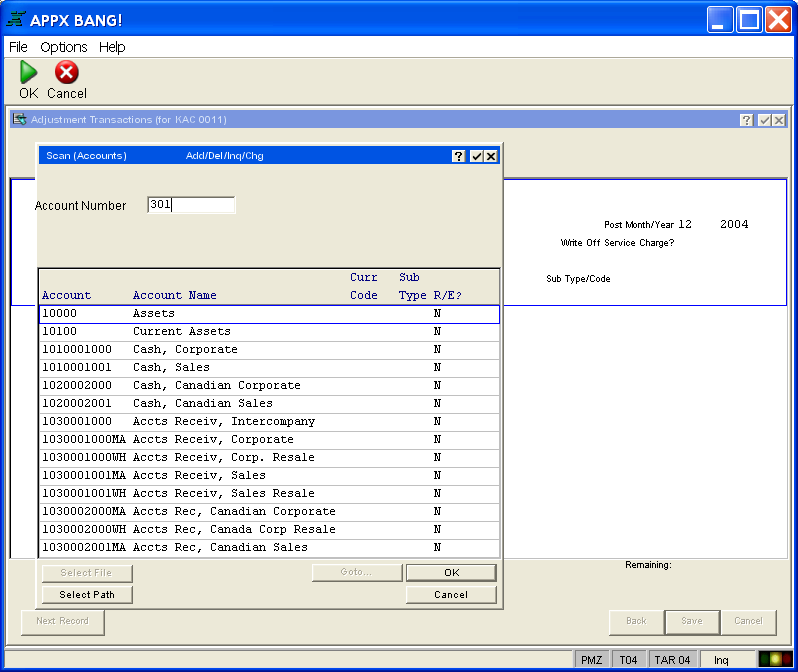
Figure 10. Constraining the Scan Operation
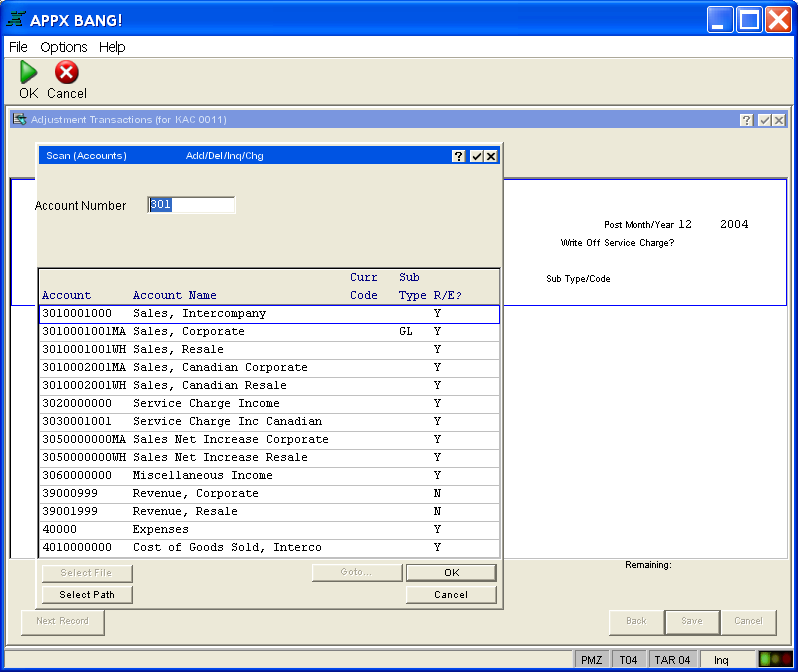
Figure 11. A Constrained Scan Display
The SCAN option will “remember” the choices you make when you scan an item. APPX will record which file you choose to scan as well as which access path you decide to use. This means that once you scan an item during data entry, you will no longer have to specify which file you want to access and which key path you want to use the next time you need to scan that item again, even if you have logged off the system in the interim. However, your SCAN choices are "forgotten" if the executable module (Em) for the data entry process is rebuilt (for instance, if the process is changed by the application designer or if Em's are regenerated). This is because SCAN preferences depend upon some information stored in the process Em, and that information changes when the Em is rebuilt. Once that happens, you will need to make your choices again.
When you are viewing the list of record choices you will have the following options:
Choose a new file to scan (if more than one file is available).
Re-specify the access path. This is done by selecting the Paths option at the bottom of the Scan display. The result of selecting this option is shown in Figure 12. By selecting the Paths option for the Chart of Accounts File, you are given a choice of scanning the file based on accounts numbers or by account descriptions. Select the desired path by clicking on it (description, in this example). The Scan display refreshes with the file’s records ordered by the new access path as shown in Figure 13.
Select one of the file maintenance modes (Add, Change, Inquire, or Delete) to perform maintenance on the file being scanned. This option is available only on files selected by your application designers. Upon completing file maintenance in the scanned file, select END to return to the original process.
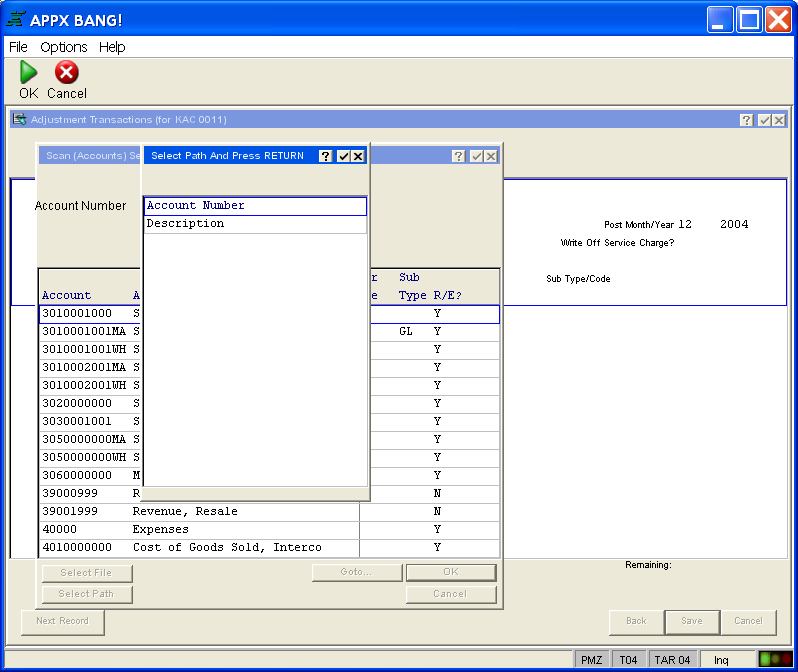
Figure 12. Selecting the Scan Path Access

Figure 13. Scan Display By Description